
I'm so lucky to have such a wonderful Grandma! She has always been there for me and this year she turned 80. She's the type that has always lied about her age, and would be mortified for anyone to know her true age. But how can we throw her a surprise party for the big 8-0 with out spilling her age? And me, well being me, just wouldn't want to hide it! She should be proud anyway. She is absolutely beautiful! And really, if you keep lying about your age, you might start to look old for your age, instead of looking great for your age, which she does! I was in charge of the decorations, and my cousin was in charge of the food as well as hosting it at her house. I spent a couple of weeks on everything, hoping it would all be perfect, and I just had the best time with everything. Unfortunately, as I was walking out the door with a car full of decorations and the cake the night before the party, I received a call from my grandma telling me that she took a tumble. She fell while walking the dog, and when she called to ask me to meet her at the hospital, I couldn't tell her that I was too busy getting her party together! I took everything out of the car and I met her at the hospital, where she was told that she broke her shoulder, and then I spent 2 hours at Walgreen's trying to get her scripts. What a long night! I didn't get to my cousin's house until about midnight after coming back to the house to pick everything back up. In the process of kissing my daughter goodnight right before I left, I forgot my camera in her room. So these pics were all taken with my phone. The first thing out of my grandma's mouth when she walked in the door, after yelling "surprise!", was "Oh, my face!". She was in a lot of pain, but played if off well. She was so surprised and the night when off without a hitch!
Here are the black and white themed decorations and feel free to print the free printables (at the bottom of the post).....
This banner looked so great in person! I wish that the camera would have shown it :(


I made a yarn wrapped wreath, with felt roses and satin and lace flowers. The 80th was made from cardboard, fabric and felt (I'll post a tutorial for the wreath soon). Again, the camera just doesn't do it justice.


My cousin's entryway didn't have furniture in it, so I was excited to bring over my foyer table that I recently made over with Miss Mustard Seed Milk Paint in Linen!

A simple inexpensive addition to the table, sticking with the black and white theme, are the spray painted branches that I cut from a near by park in glass vases held up with black rocks (all from the dollar store!). I love adding a natural element.

As I was in search of the cake, I just couldn't find anything that fit the theme that was somewhat affordable, and I didn't want just flowers. I wanted the cake to look elegant. I'm no baker, but I am brave ;). I was at Walmart picking up some other things for the party, and in the baking section, I saw this beautiful demask sugar paper. I had also never worked with fondant but always wanted to. How hard could it be. I did have to buy all of the tools, so that added to the cost, but in terms of just the cake, it was SO much cheaper to do it this way! I made a double layer white cake with white frosting. I used white fondant and Tiffany blue fondant for the dots. The letters are also sugar paper (since my handwriting isn't that great I thought I better go with the paper). It really was simple to make and I will be making my own cakes in the future! The cake itself was super delicious, but the fondant was a bit too gummy for my liking. The only thing that was a bit of a disappointment on the cake was the squiggly lines around the top. When I sent the hubby out for frosting, he bought whipped frosting, which was far too runny to make the pretty row of dots that I had envisioned. I even added some powered sugar, but it didn't get stiff enough....so squiggly lines it got.

 |
| Getting the table ready. I hadn't even decorated the cake until LITERALLY 15 minutes before the party started! |


 |
| My dad, me, and my cousin, Nikki |
 |
| The birthday girl and my dad |
 |
| The fabulous party planners! My favorite cousin :) |
 |
| my 2 brothers |
 |
| my twin brother and I |
 |
| my older bro |
 |
| bad family pic |
The first image is of the cupcake wrapper template. The template doesn't show up on this image, but when you click it to download, it will be there :)
cupcake wrapper template:

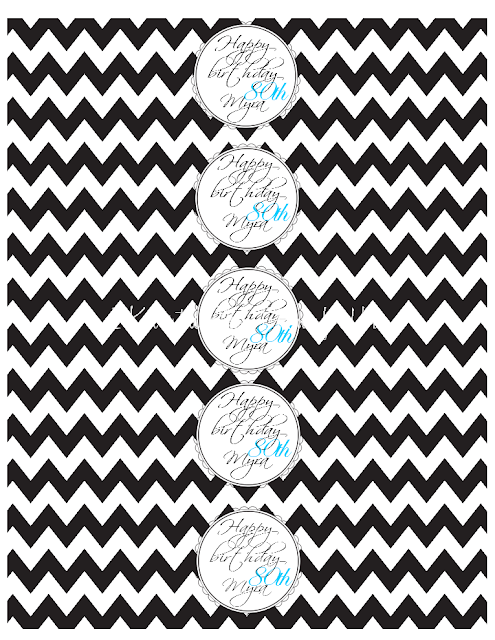
water bottle labels:

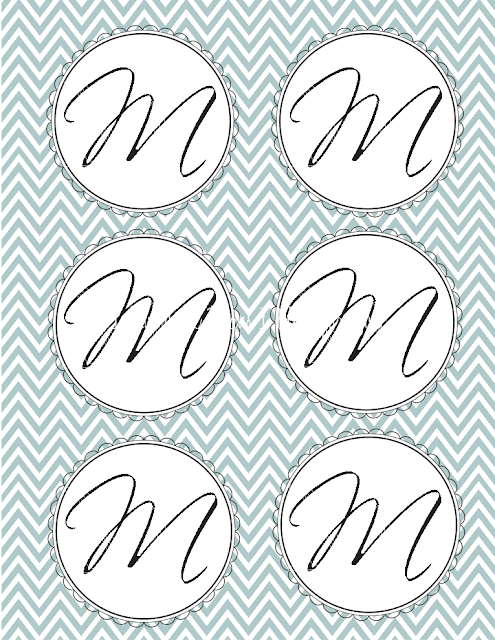
monogrammed labels for gifts or anything you'd like:
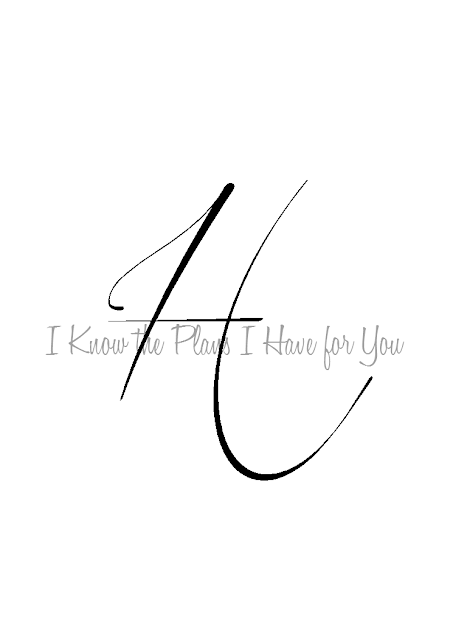
Happy Birthday Banner: I printed each letter onto heavy card stock, cut to size and rounded the edges, and then glued to black and white print paper. I punched a hole into the corners and put it together with colored twine (from the dollar store). Once you download the PDF file, you will be able to change the "H" to all the letters that you need or to make the banner say anything else while keeping the same font.
 The party was such a success! I was so proud of my cousin who did all of the delicious food and so proud that we pulled it off!! Thanks for stopping by and I hope you enjoy these printables!!


water bottle labels:
cupcake labels, food labels, or gift tags:
Happy Birthday Banner: I printed each letter onto heavy card stock, cut to size and rounded the edges, and then glued to black and white print paper. I punched a hole into the corners and put it together with colored twine (from the dollar store). Once you download the PDF file, you will be able to change the "H" to all the letters that you need or to make the banner say anything else while keeping the same font.
Awwww! It turned out great, Jill! I love the black and white theme! Very classy! Can't wait to catch up tomorrow! =)
ReplyDeleteI think you did an amazing job on everything!
ReplyDeleteYour party turned out great! :) I love all of the black & white. I am now your newest follower.
ReplyDeleteShannon @ Sewing Barefoot
www.sewingbarefoot.blogspot.com
No. Way. That woman is NOT 80 years old! I'd be shouting from the rooftops if I looked that good NOW! And I'm "only" 65! She is beautiful. And your party looks fantastic!
ReplyDelete